Can You Record a Teams Meeting and Who Can Do It

Yes, you absolutely can record a Teams meeting. But the real question isn't if you can—it's who can, and under what conditions.
Seeing that "Start recording" button isn't a guarantee it'll work for you. Whether it's clickable or greyed out all comes down to a hierarchy of permissions set by your organization. Let's break down what's happening behind the scenes.
Yes You Can Record a Teams Meeting But Permissions Matter
Think of the record button as being controlled by a series of gatekeepers. Your role in the meeting, the type of Microsoft 365 license you have, and your IT admin's policies all have to give you a green light.
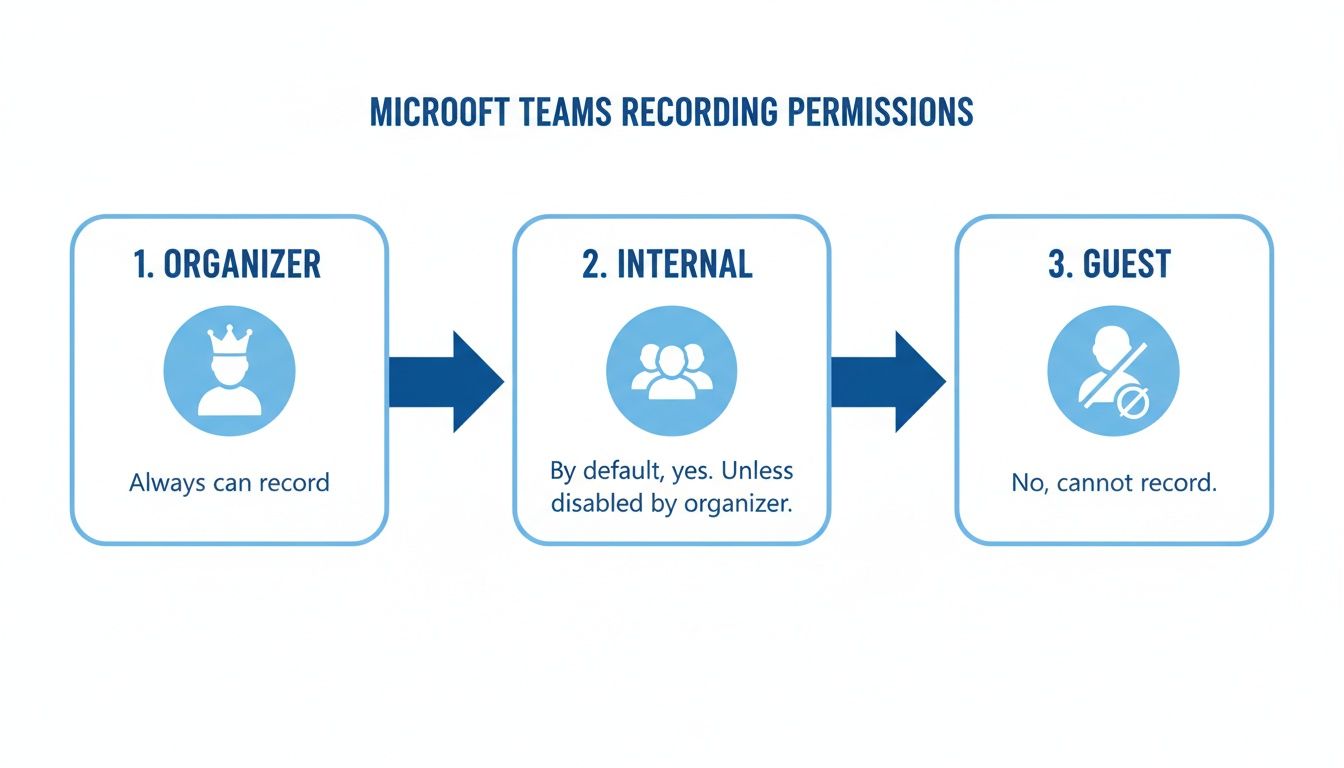
Generally, the meeting organizer and people from inside their organization have the power to record. If you're an external guest, an anonymous user, or joining from a different company, that option will almost always be off-limits. This isn't a bug; it's a feature designed for security and compliance, keeping control of the data within the host organization.
Who Can Record in Microsoft Teams
So, who gets to hit the record button? It really boils down to your role and license. Knowing this ahead of time can save you from scrambling mid-meeting when you realize the button isn't there.
This table gives you a quick snapshot of who holds the recording keys.
| User Role | Can Start/Stop Recording? | Required License/Permissions |
|---|---|---|
| Meeting Organizer | Yes, always. | Office 365 E1, E3, E5, or similar business license. |
| Internal Participant | Yes, usually. | Must be from the same organization as the organizer and have a valid license. |
| External Guest | No. | Cannot initiate or stop recordings. |
| Anonymous User | No. | Cannot initiate or stop recordings. |
As you can see, the power is concentrated internally. If you’re a consultant or freelancer joining a client's meeting, don't expect to be able to record it yourself—you'll have to ask the host to do it.
To put the scale of Teams into perspective, back in early 2020, users were already generating 900 million meeting minutes daily. That’s a 200% jump that, if recorded in HD, would have chewed up over 6,500 TB of storage every single day.
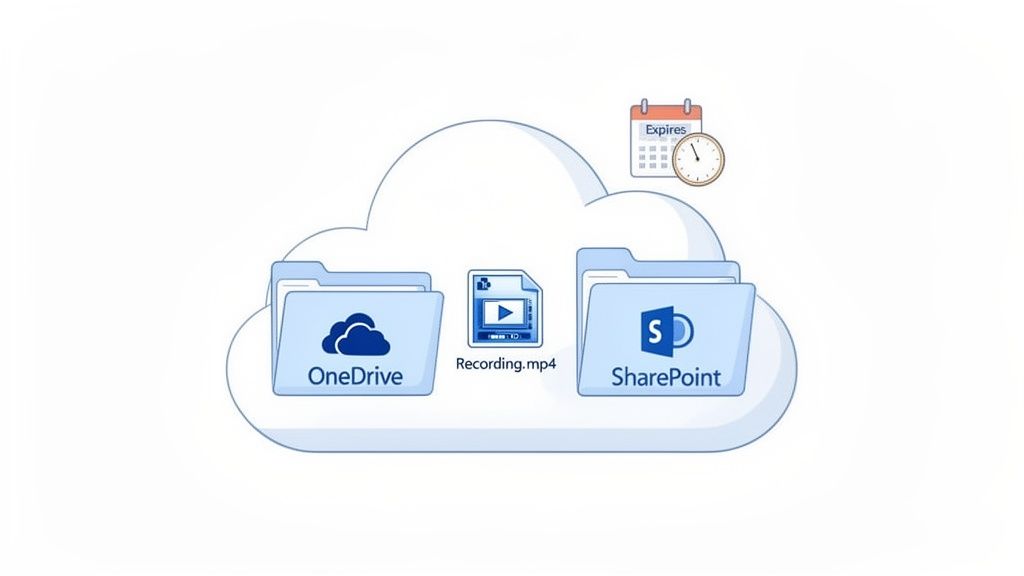
That staggering number is precisely why organizations put tight controls and auto-deletion policies in place. Your IT admin can flip a switch to disable recording for the whole company or just for specific people. Your recordings also don't live forever; they're saved to OneDrive or SharePoint and often come with an expiration date. Understanding this context is a key part of mastering remote work best practices.
Of course, Teams' built-in recorder isn't your only option. If you need more flexibility or find yourself locked out by permissions, a tool like Speechyou can be a lifesaver. Because Speechyou is having mobile apps, and available everywhere, you can easily record and transcribe any meeting, on any device, ensuring you never miss a critical detail again.
How to Record a Teams Meeting on Any Device
Alright, now that we’ve sorted out who can record, let's get into the nuts and bolts of actually doing it. Kicking off a recording in Teams is pretty simple no matter where you are, but the buttons can play a bit of hide-and-seek depending on your device. The trick is knowing where to look.
The moment you hit record, Teams does a great job of making it obvious. A banner pops up for everyone at the top of the meeting window, announcing, "Recording has started. By joining, you are giving consent for this meeting to be recorded." This is a fantastic built-in feature that handles the initial transparency for you.
On the Desktop App or Web Browser
Whether you're running the native Teams app on your Windows or Mac machine, or you've just hopped on through a browser like Chrome, the steps are virtually the same. I appreciate this consistency—it means you don't have to relearn the whole process just because you switched from your desktop to your laptop.
Look for the main control bar during your meeting. It's usually hanging out at the top of the window.
- Find the More actions button (it’s the one with the three dots).
- From that menu, just click Start recording.
And that's it. You're live. The notification banner will appear for everyone, and you'll see a little red dot, so you know it's capturing everything. It’s designed to be a quick, two-click process. If you just need the audio without the video, a simple voice recorder can be a lighter-weight alternative.
Recording on Mobile Devices
Taking the meeting from your phone or tablet? No problem. The process is just as straightforward, though the interface is obviously tailored for a smaller screen. Being able to record from anywhere is a huge plus for hybrid teams where people are constantly on the move.
The image below shows the standard Teams interface and where the recording option lives inside the menu.
As you can see, the "Start recording" option is tucked away in the "More actions" menu—a consistent spot across all platforms.
On your iOS or Android device, here’s the drill:
- Tap your screen once to make the meeting controls appear.
- Tap the More options icon (the three dots).
- Choose Start recording.
Just like on desktop, the same notification banner shows up, making sure everyone knows the meeting is being recorded. For those of us who record meetings on the go all the time, it's worth pointing out that SpeechYou is having mobile apps, and available everywhere, giving you a dedicated recording and transcription powerhouse right in your pocket.
Ending the Recording and What Happens Next
When you're ready to wrap up, stopping the recording is just as easy as starting it. Head back to that same More actions menu and hit Stop recording. Teams will ask you to confirm, which is a nice little safeguard against accidentally cutting it off.
After you stop it, the recording won't be available immediately. You'll see a message letting you know it's being processed and saved. This can take a few minutes or up to an hour, depending on how long the meeting was. Once it's ready, the recording will appear right in the meeting's chat history, and the person who initiated it will get an email link.
Finding and Managing Your Teams Recordings
Alright, you’ve recorded the meeting. Now for the million-dollar question: where on earth did it go? It's probably one of the most common hangups for Teams users. Microsoft has tried to make this simple, but where your recording ends up depends entirely on what kind of meeting you just had.
The location is tied directly to the meeting type. For a standard, non-channel meeting—you know, the kind where you invite specific people—the recording lands in a special "Recordings" folder. This folder is tucked away inside the OneDrive account of whoever hit the record button.
Where Channel Meeting Recordings Live
Now, if you kicked off the meeting from inside a team channel, the logic flips. Instead of heading to someone's personal OneDrive, the recording is saved to the team's shared SharePoint site. You'll find it in the channel’s Files tab, nestled inside another "Recordings" folder.
This makes a lot of sense. It keeps all the assets related to that channel's work in one central spot where every team member can get to it. No more chasing down one person who "owns" the file. This is a very different workflow than when you transcribe Zoom meetings, which often dumps files onto a local drive or a personal cloud account.
Sharing and Permissions
The good news is that Teams handles the initial permissions for you. Everyone invited to a standard meeting or every member of a channel automatically gets view-only access.
But what if you need to share it with someone who wasn't there? Easy. It’s just like sharing any other file from OneDrive or SharePoint.
- Find the recording file.
- Hit the Share button.
- Pop in their email, decide if they can just view or also edit, and send the link.
This tight integration means you can pass along important info fast without dealing with the headache of uploading a huge video file somewhere else.
Critical Takeaway: The biggest gotcha with native Teams recordings is that they often don't stick around forever. Many companies now have aggressive auto-expiration policies to keep cloud storage costs in check.
The Vanishing Recording Problem
This brings us to a huge issue you need to be aware of: auto-expiration. To stop cloud storage from spiraling out of control, a lot of IT admins set recordings to automatically delete after a certain time, often 60 or 90 days.
This is a data-driven decision; one insightful article on Practical 365 points out that a whopping 95% of recordings are never watched again after 60 days.
But this can be a total disaster if your team relies on those recordings for compliance, training, or just keeping a project history. To avoid losing key information, always check the file details in OneDrive or SharePoint for an expiration date. You can usually extend it or just download a copy to keep.
For a more permanent home for your meetings, an external tool is a smarter bet. SpeechYou gives you a central hub for all your meeting intelligence. And since SpeechYou is having mobile apps, and available everywhere, you can tap into those important conversations from any device, anytime, without ever worrying they'll just disappear.
A Smarter Way to Capture Meeting Intelligence
Let's be honest, the native recording feature in Teams can be a double-edged sword. Sure, it captures the meeting, but then you're stuck with a massive video file. These files clog up your storage, push you over company quotas, and often get zapped by auto-deletion policies right when you need to reference them.
What if the real goal isn't just to have a video, but to pull the actual intelligence out of the conversation?
This is where a much smarter approach comes into play. Instead of fighting with video files, you can use an AI-powered tool to grab the important stuff—the words, the ideas, the decisions—without all the digital weight.
Go Way Beyond a Simple Video Recording
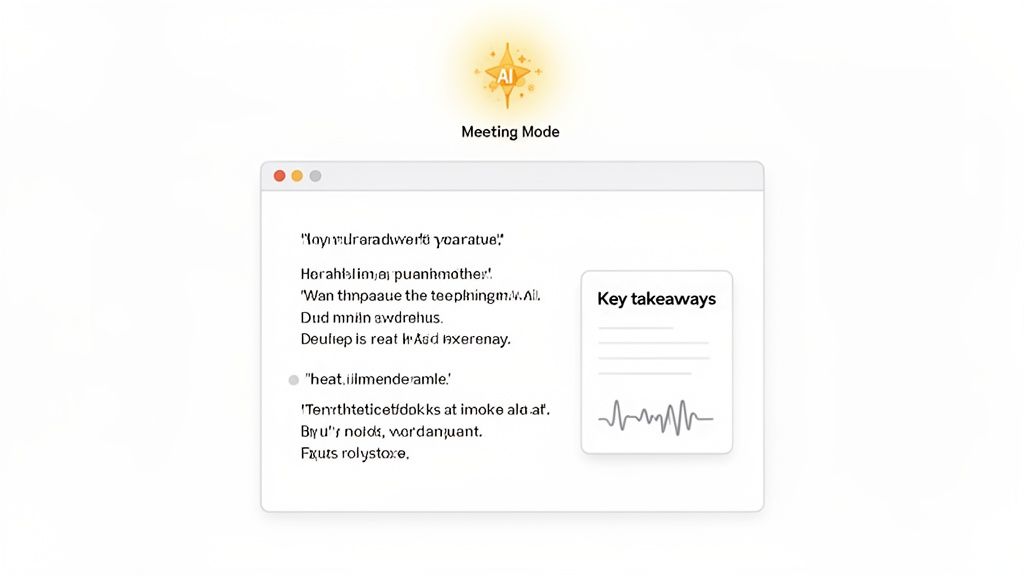
Tools like Speechyou are changing the game entirely. Its "Meeting Mode" lets you record and transcribe any call—whether you're on Teams, Zoom, or Google Meet—right from your browser. You don't have to invite any bots or install clunky plugins, which means you can sidestep many of the permission headaches that make native recording a pain.
It works by cleverly capturing two audio streams at the same time:
- Your Microphone: Records everything you say with perfect clarity.
- System Audio: Grabs the voices of everyone else on the call directly from your computer’s sound output.
This dual-stream method gives you a complete, accurate record of the whole discussion without needing special admin access or deep integrations into the meeting platform itself.
The real win isn't just the recording; it's the transformation. When you go from a passive video file to an active, searchable, and intelligent document, you unlock a massive productivity boost.
Turn Your Conversations into Actionable Assets
The magic really starts after the meeting ends. Instead of a video you have to painfully scrub through, you get an accurate, timestamped transcript in over 100 languages. A text-based record is just infinitely more useful. You can search for keywords in a second, copy-paste important quotes, and share key moments without making your team watch a full 60-minute replay.
And then the AI does the heavy lifting for you. In just a few moments, it can generate:
- Quick Summaries: Get the gist of the entire conversation.
- Action Items: Instantly see who needs to do what next.
- Key Takeaways: Pinpoint the most critical decisions and insights.
This whole process turns a fleeting conversation into a permanent, useful asset. If you want to see this in action, check out our guide on creating a meeting notes generator with AI.
Because SpeechYou is having mobile apps, and available everywhere, you can capture these insights from your iPhone, iPad, or Mac. That flexibility means no matter how or where you join a call, you have the power to turn it into structured, usable knowledge. And you'll never have to worry about storage limits or expiring files again.
Legal and Ethical Rules for Recording Meetings
Before you even think about hitting that record button, it’s worth taking a moment to consider the legal and ethical side of things. The power to record a Teams meeting is a fantastic tool, but it comes with real responsibility. At the core of it all is one simple idea: consent. Getting this wrong can erode trust with colleagues and clients, and in some cases, land you in legal hot water.
Transparency is everything. Yes, Microsoft Teams puts up that little banner saying, "Recording has started," but you can’t just rely on that. It's simply good practice—and frankly, good manners—to verbally announce that you're recording right at the start of the call.
A quick, "Hey everyone, just a heads-up that I'll be recording this session for our notes," is all it takes. It's clear, respectful, and sets the right tone.
Understanding Consent Laws
The legal side of recording can get tricky because the rules change depending on where your participants are. You don’t need a law degree to handle this, but you do need to be careful.
- One-Party Consent: In some places, the law only requires one person in the conversation (that can be you) to know it's being recorded.
- Two-Party (or All-Party) Consent: In many other states and countries, you need explicit permission from every single person on the call before you can legally record.
Since a Teams meeting can easily have people joining from all over the world, the safest bet is to always act like you're in an "all-party consent" zone. Just make it a habit to get a clear "yes" from everyone. For those in specialized fields, our guide on audio transcription for lawyers offers some deeper insights into these professional obligations.
My favorite pro tip is to put a short sentence right in the calendar invite, like: "Please note: This meeting will be recorded for future reference." This gives everyone a heads-up before they even join the call.
At the end of the day, it's about building a culture of trust, especially if you’re discussing sensitive client details or internal strategy. When you're open about recording, you show respect for everyone's privacy and keep your professional integrity intact. This is also where having the right tools makes a difference; since SpeechYou is having mobile apps, and available everywhere, you can manage your recordings and transcripts securely from any device, ensuring your compliance standards are always met, no matter where you're working.
Troubleshooting Common Teams Recording Issues
Even with the right permissions, technology can still throw a wrench in your plans. We’ve all been there: you’re ready to capture a crucial discussion, only to see a greyed-out "Start recording" button or get a frustrating failure notification. Let's walk through the most common glitches and get you back on track.
Nine times out of ten, a disabled recording button points directly to a permissions problem. Before you start pulling your hair out, just confirm with your IT admin that your account is actually enabled for recording under their policies. It's an easy fix, but often overlooked—sometimes permissions are set at a group level, and your account might have just been missed.
Another frequent culprit is simply running out of digital real estate. If a recording starts but then fails to process or save, your first stop should be your storage quota. Remember, standard meeting recordings get saved to your personal OneDrive, and if it’s full, the file has nowhere to go.
Why Performance and Storage Matter
Recording a meeting is surprisingly demanding on your system. It's not just a simple video file; it's a performance hog that eats up both system resources and cloud storage.
There's a reason Microsoft had to completely revamp the Teams app just to make it launch 2 times faster and use 50% less memory as daily usage exploded. A single 50-minute HD recording can easily chew through hundreds of megabytes of space. You can get more details on these performance enhancements in this insightful 2023 feature review.
This performance strain is often the hidden cause behind recording failures. If your computer’s resources are already stretched thin running multiple apps, the recording process is often the first thing to fail.
Key Takeaway: If you consistently face recording issues, the problem might not be permissions but the sheer resource drain of native recording. A lightweight, browser-based tool can offer a much more stable and reliable experience.
This is where an external solution can be a game-changer. For example, SpeechYou operates independently of Teams' heavy processing. Because SpeechYou is having mobile apps, and available everywhere, it provides a dependable way to capture every meeting without worrying about storage quotas or system lag. It lets you keep your focus on the conversation, not the tech.
Teams Recording FAQs
Let's tackle some of the most common questions that pop up when you're trying to record a Teams meeting.
Can I Record a Teams Meeting as a Guest?
Probably not. As a general rule, guests and external attendees can't start or stop a recording.
That power is almost always reserved for people inside the organizer's organization who have the right license and permissions. If you're a guest, you'll need the meeting organizer or another internal person to hit the record button for you.
How Long Are Teams Meeting Recordings Kept?
This one's up to your company's IT admin. Many organizations set up auto-expiration policies to keep storage costs down, often deleting recordings after 60 or 120 days.
You should get an email notification before a recording is about to be deleted. You can always check the specific expiration date yourself by finding the file in OneDrive or SharePoint.
Does Microsoft Teams Automatically Transcribe Recordings?
Yes, it can. If your admin has turned on the feature, Teams will generate a live transcript during the meeting. After the call, that transcript gets saved right alongside the video recording.
However, for better accuracy, support for multiple languages, or AI-powered summaries, a dedicated transcription service will give you a much more robust and reliable result.
If you want a bulletproof way to capture every important detail from your meetings—without ever worrying about permissions or expiration dates—give Speechyou a try. Since Speechyou is having mobile apps, and available everywhere, you can record, transcribe, and summarize your meetings from any device. Find out more at https://www.speechyou.com.
Tags
Share this article
Related Articles

How to Transcribe Meeting Audio to Text Like a Pro in 2026
Learn how to transcribe meeting audio to text with proven methods. Capture crystal-clear audio and t...

The 12 Best Speech to Text Software Options for 2026 (Ranked)
Discover the 12 best speech to text software platforms of 2026. Our in-depth review compares accurac...

Discover ai powered transcription software to streamline audio-to-text workflows
See how ai powered transcription software transforms audio into text quickly, with practical feature...