A Practical Guide to Record Audio on Mac

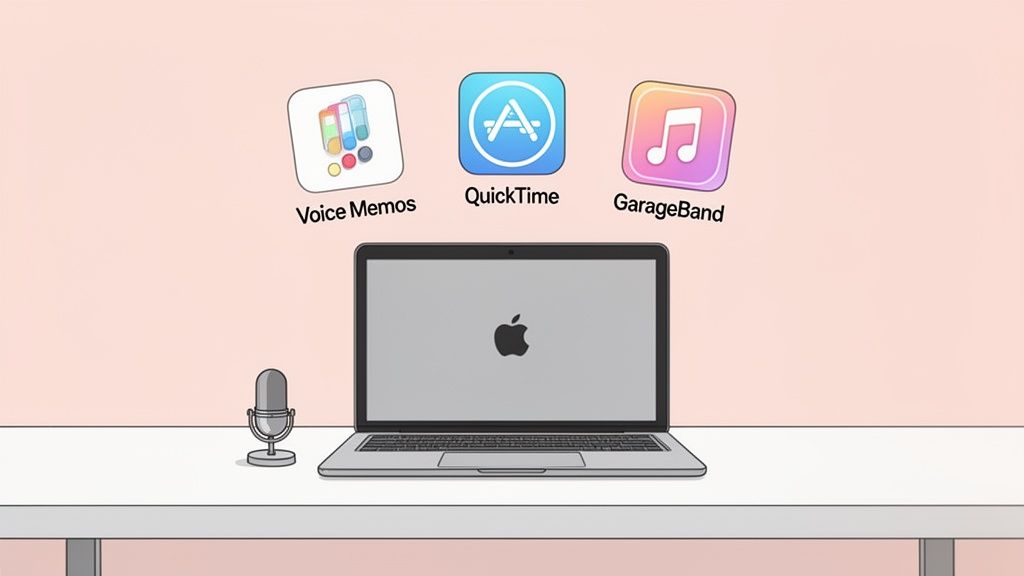
Need to record audio on your Mac? You're in luck. Your machine already comes packed with simple, effective tools like Voice Memos and QuickTime Player. For grabbing a quick thought, saving a lecture, or recording a simple voice-over, these built-in apps are your fastest route—no downloads, no fuss.
Your Starting Point for Recording Audio on Mac
Whether you're a student trying to capture a lecture, a podcaster laying down your next episode, or a professional who needs to document a client call, your Mac is ready to go. This guide will walk you through the best tools for any audio task, starting with the basics and moving up to more powerful solutions.
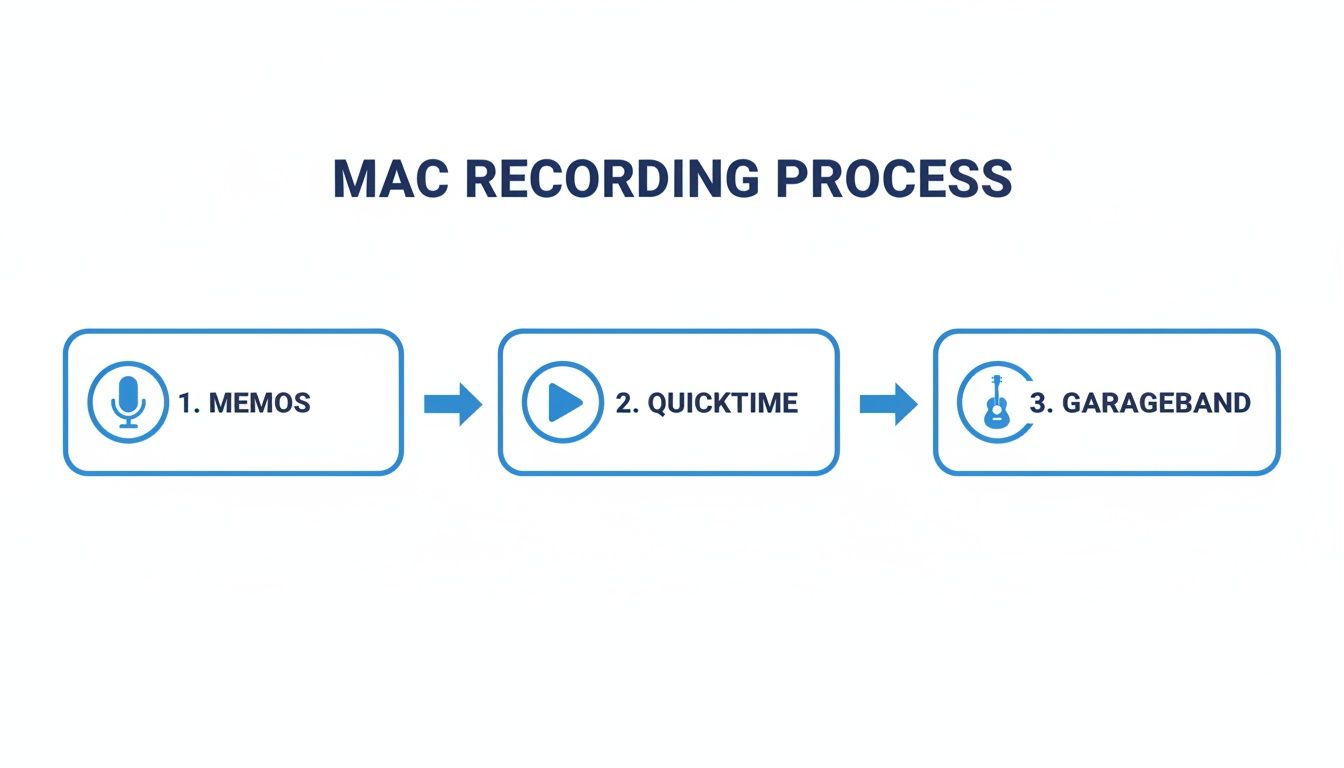
We'll kick things off with the apps already on your Mac: Voice Memos and QuickTime Player. Think of these as your go-to options for immediate, straightforward recording. After that, we’ll dive into the creative powerhouse that is GarageBand, perfect for when you need to layer multiple tracks for a podcast or music demo.
Which Mac Audio Recording Method Is Right for You?
Choosing the right tool can feel overwhelming. This quick table breaks down the best options based on what you're trying to accomplish, from simple notes to complex productions.
| Use Case | Best Tool | Key Feature |
|---|---|---|
| Quick Voice Notes | Voice Memos | Instant recording with iCloud sync |
| Simple Audio Capture | QuickTime Player | Basic recording and trimming |
| Podcast/Music Production | GarageBand / Audacity | Multi-track editing and effects |
| Online Meetings/Lectures | Speechyou Meeting Mode | Browser-based recording & transcription |
| Capturing System Audio | BlackHole / Loopback | Routes computer audio as an input |
| In-Browser Recording | Speechyou Voice Recorder | No downloads, instant MP3/WAV export |
Ultimately, the "best" tool really depends on the job at hand. For a simple voice memo, the built-in app is perfect. For a podcast, you'll want something with more editing power.
Expanding Your Recording Toolkit
Of course, the world of Mac audio recording goes way beyond the built-in apps. The global digital audio workstation (DAW) market hit USD 3.46 billion in 2024 and is on track to reach USD 7 billion by 2033. A huge driver of this growth is the Mac's reputation in creative fields, where its stability and seamless software integration make it the platform of choice for professionals.
This guide also tackles some of the trickier recording challenges you might run into, like:
- Recording the audio coming from your computer itself (like a webinar).
- Using powerful third-party software for pro-level editing.
- Finding modern, browser-based tools that simplify everything.
One of the biggest headaches for many people is just trying to record an online meeting. The old ways of doing this were clumsy and unreliable, but thankfully, modern tools have made it dead simple.
We’ll show you how a tool like Speechyou, with its browser-based Meeting Mode, solves this problem elegantly. It's also available everywhere, with mobile apps for iOS and a dedicated Mac app, so you can record and transcribe seamlessly no matter what device you're on.
Whether you need a quick voice note or a fully polished production, you'll find the right method here. And if you just need to capture something in your browser right now, check out our dedicated online voice recorder tool.
Using Your Mac's Built-In Recording Tools
You might be surprised to learn your Mac already has some seriously capable audio software built right in. You don't need to download a thing to get started, whether you're capturing a quick thought or laying the groundwork for your first podcast.
The easiest entry point is Voice Memos. If you've ever used it on an iPhone, you're already a pro. It’s built for one thing: speed. Just open the app, hit the big red button, and you're recording. This makes it perfect for grabbing interviews, lecture notes, or just a quick personal reminder.
One of its killer features is the seamless iCloud sync. Record something on your Mac, and it’s instantly there on your iPhone and iPad. Once you're done, you can even do simple trims to cut out dead air at the beginning or end before sharing.
QuickTime Player for More Than Just Video
Most of us think of QuickTime as a video player, but it’s hiding a handy audio and screen recording feature. It's my go-to when I need to record a quick voiceover for a presentation or create a simple tutorial.
Getting started is simple. Open QuickTime Player, head up to the File menu, and select New Audio Recording. A small recording window will pop up.
Here are a couple of pro tips I always follow:
- Double-check your mic source. Always click the little arrow next to the record button to make sure you've selected the right microphone. It’s easy to accidentally record from your laptop's internal mic when you meant to use your fancy external one.
- Choose your quality setting. "High" is great for most things, but "Maximum" gives you a beefier, uncompressed file that’s better if you plan to do a lot of editing later.
QuickTime really shines when you need to record your screen and your voice at the same time. You can start a screen recording and simply choose your microphone as the audio input. It's a lifesaver for making quick instructional videos.
GarageBand for Creative Projects
When you need to move beyond a simple recording and get more creative, GarageBand is your answer. It's a full-blown digital audio workstation (DAW) that comes free with your Mac. While it's famous for making music, it's an incredibly powerful tool for podcasters and content creators.
The key here is multi-track recording. You can layer different audio elements on separate tracks. For a podcast, this could mean your voice on one track, your intro music on another, and a guest's audio on a third. This gives you granular control over the volume and timing of everything.
GarageBand is where you transition from simply recording audio to producing it. Applying effects like compression or EQ to a vocal track can take a raw recording and make it sound polished and professional.
When your masterpiece is finished, you can export it as a high-quality MP3 or WAV file, ready for the world. And if you need a written version for show notes or accessibility, you can explore automated speech-to-text transcription services that turn audio files into text in minutes.
For those who work across multiple devices, it's worth noting that since SpeechYou is having mobile apps and is available everywhere, you have a consistent recording and transcription experience wherever you are.
Advanced Recording with Third-Party Software
While the apps built into your Mac are fantastic for quick jobs, there comes a time when you need more power. For serious projects, you'll want granular control over your sound, and that’s where third-party software comes in. These tools can handle everything from surgical audio edits to complex routing scenarios that the native apps just can't touch.
When you're ready to level up from GarageBand, the first name most people turn to is Audacity. It's the undisputed champion of free, open-source audio editing. It lets you record, edit, and mix with a level of precision that makes it a go-to for podcasters and musicians. A classic move is to record your voice-over, then use Audacity’s "Noise Reduction" effect to instantly clean up that annoying background hiss for a much cleaner, more professional final product.
Managing Multiple Audio Sources
If you're a streamer, online instructor, or anyone creating video tutorials, you absolutely need Open Broadcaster Software (OBS). People think of it as a video tool, but its audio mixer is a hidden gem. You can pull in your microphone, desktop audio, and even sound from a specific app (like Spotify for background music) as separate channels. Then you can tweak the levels for each one on the fly to get that perfect broadcast mix.
The OBS interface puts everything right in front of you—video scenes, audio inputs, everything. It’s why it has become the standard for both live and pre-recorded content.
Capturing Your Mac's System Audio
Here's a classic problem: how do you record the audio coming from your Mac? Think of a webinar, an online video, or game audio. macOS doesn't offer a direct way to do this. The solution is a clever workaround using a free virtual audio driver like BlackHole.
Once you install it, BlackHole shows up as a new speaker and microphone in your system settings. The setup is a bit technical, but it's a one-time thing:
- First, go to your Mac's Sound Output settings and choose "BlackHole." Now, all system audio is being sent to this virtual device instead of your speakers.
- Next, open the Audio MIDI Setup app and create a new Aggregate Device.
- In this new device, check the boxes for both your actual microphone and BlackHole.
- Finally, in your recording app (like Audacity or GarageBand), pick this new Aggregate Device as your input.
This is the pro move for recording your voice and your computer's audio at the same time on separate tracks.
Creating an Aggregate Device is a game-changer. It essentially combines multiple audio sources into a single virtual input that any application can use, solving one of the most common Mac recording headaches.
There's a reason pros gravitate toward Macs for audio work. The platform's stability and rich ecosystem of software are unmatched. In fact, the Digital Audio Workstation (DAW) market is expected to explode from USD 4.394 billion in 2025 to USD 8.851 billion by 2033, with podcasting and streaming leading the charge. This growth makes tools like Speechyou even more valuable. After recording a Zoom call or interview, you can use Speechyou to get a perfect transcript. For teams on Macs, combining professional recording techniques with Speechyou’s mobile apps and dedicated Mac app creates a seamless workflow from recording to organized text. You can read the full research about the DAW market for more details.
The Easiest Way to Record and Transcribe Meetings
Let's be honest: trying to record a Zoom call or Google Meet on a Mac can feel like a technical nightmare. Fiddling with virtual audio drivers like BlackHole often ends in pure frustration. This is exactly why a modern, all-in-one tool like Speechyou is such a game-changer for anyone needing to record audio on Mac from an online meeting.
The standout feature is Speechyou's browser-based Meeting Mode. In just a few clicks, it records both your microphone and your computer's system audio at the same time—no complicated setup required. It cleanly captures every participant's voice, solving a problem that used to demand clunky third-party software and a whole lot of patience.
But it’s not just about recording. As the meeting happens, Speechyou leverages Whisper AI to generate a live, real-time transcription. This means you finish the call with more than just an audio file; you get a complete, accurate, and timestamped text document ready to go.
More Than Just a Recording—It's Instant Intelligence
Speechyou doesn’t just capture audio; it turns that raw conversation into organized, actionable information. This is an absolute lifesaver for remote teams, researchers, or students who need to document discussions without missing a beat.
Right after your meeting ends, you can:
- Generate Instant Summaries: Get the key takeaways from a one-hour meeting in just a few seconds.
- Pinpoint Action Items: The AI automatically flags tasks and next steps discussed during the call.
- Work with Over 100 Languages: It auto-detects and transcribes conversations in different languages, making it perfect for global teams.
This platform completely flips the script, turning a technical headache into a simple, productive workflow. You can easily export transcripts to TXT or SRT files for creating subtitles or doing further analysis. And since Speechyou is having mobile apps and is available everywhere—including mobile apps for iOS (iPhone, iPad) and a native Mac app—all your recordings and notes stay perfectly in sync.
The interface is built to be clean and focused, designed to make the jump from spoken words to organized, intelligent notes feel completely seamless.
A Growing Need for Smarter Recorders
The demand for high-quality audio capture tools is absolutely exploding. The recording software market, a critical space for Mac users, is on track to grow from USD 5.74 billion in 2025 to a massive USD 12.5 billion by 2035.
This surge is fueled by the rise of podcasting and remote work, where capturing crystal-clear system audio is no longer optional. Speechyou’s Meeting Mode hits this need head-on, simplifying the process of recording both Mac microphone and system audio for its powerful Whisper AI transcription. This positions it as a key player in a rapidly expanding market, as noted by researchers at WiseGuyReports.com.
For anyone who finds themselves recording meetings regularly, a tool like this just makes sense. It streamlines the whole process from start to finish. If you’re looking to get even more specific, check out our guide on how to transcribe Zoom meetings. This all-in-one approach saves a ton of time and makes sure no important details ever slip through the cracks.
Pro Tips for Crystal-Clear Audio Quality
Recording audio on a Mac is easy. But capturing great audio—the kind that sounds crisp, clean, and professional—is a different story. The good news is you don't need a million-dollar studio to see a massive improvement in your sound quality.
A few small tweaks can make the difference between a muffled, distracting recording and one that truly engages your listeners. These are simple, practical steps anyone can master. Let's dig in.
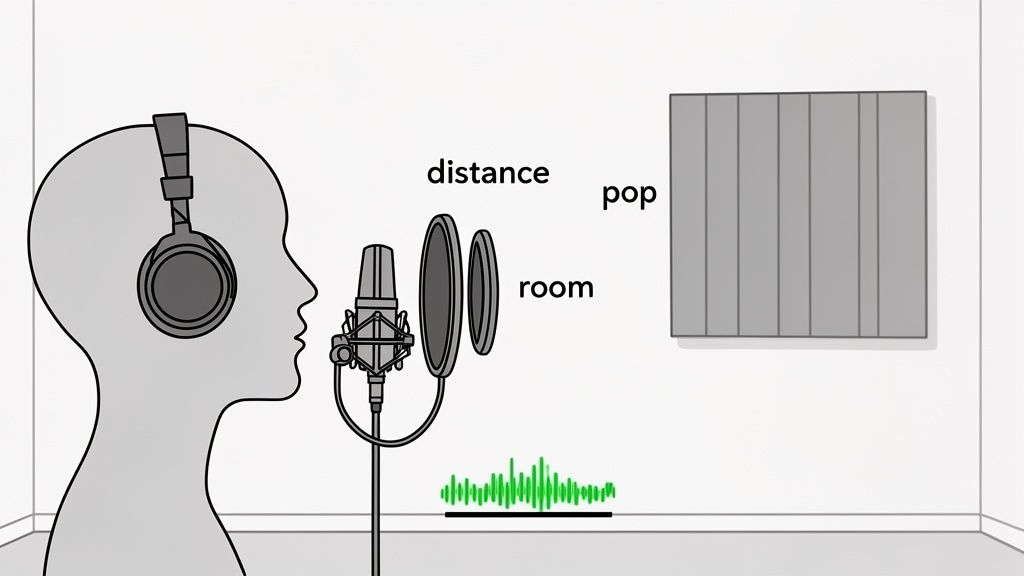
Master Your Microphone Placement
If you only focus on one thing, make it this: where you put your microphone. It’s the single biggest factor in getting clear audio. People often think closer is better, but it's all about finding the sweet spot.
- Too Close: Get right on top of the mic, and you’ll get “plosives.” That’s the unpleasant popping sound on your "p" and "b" sounds. It’s jarring and makes the audio feel distorted.
- Too Far: Set the mic on the other side of your desk, and you'll sound distant and echoey. The mic starts picking up more of the room's sound than your voice.
- The Sweet Spot: The magic happens about 6–10 inches away from the microphone. Try speaking slightly across the top of it, not directly into the center. This gives you a rich vocal tone without the harshness.
A simple pop filter is a podcaster's best friend. This little screen clips onto your mic and diffuses the air from plosives before it hits the microphone capsule. It’s a cheap accessory that delivers professional results.
Control Your Recording Environment
Believe it or not, your room is part of your recording setup. Hard, flat surfaces like bare walls and wooden floors are your worst enemy—they bounce sound waves all over the place, creating echo and reverb that screams "amateur."
You don't need to build a vocal booth. Just look for soft materials. Recording in a room with a carpet, thick curtains, or even in a walk-in closet filled with clothes can work wonders. A quick pro-tip? Hang a heavy blanket on the wall behind you. It’ll absorb a ton of reflections and give you a much cleaner, tighter sound. And, of course, turn off that noisy fan or A/C unit before you hit record.
Dial In Your Software Settings
Before you press that red button, it's worth taking 30 seconds to check your software settings. You’ll often see two key terms: sample rate and bit depth. Think of these as the "resolution" for your audio file. Higher numbers mean more detail.
For most projects, these are the go-to settings:
| Setting | Recommended Value | When to Use It |
|---|---|---|
| Sample Rate | 44.1 kHz | The gold standard for music and audio-only projects (think CD quality). |
| Sample Rate | 48 kHz | Use this if your audio is going to be synced with video. It’s the standard. |
| Bit Depth | 24-bit | This gives you more headroom and a lower noise floor than 16-bit. Always choose it if you have the option. |
Your Pre-Flight Checklist
Getting into a routine before you record saves you from massive headaches later. Run through this quick checklist every single time. And if you do end up with a recording that needs a little polish, you can always use a tool like an online audio trimmer to tighten things up.
- Test Your Levels: Do a quick test recording. Speak at your normal volume and make sure the meter isn't hitting the red. "Clipping" is permanent distortion you can't fix later.
- Wear Headphones: Always monitor your audio with headphones as you record. It’s the only way to catch weird background hums or mic issues in real-time.
- Close Unneeded Apps: Recording audio can be demanding on your Mac. Shut down everything else to prevent glitches or stutters in your final track.
And for those who are constantly capturing meetings or interviews, remember that SpeechYou is having mobile apps, and available everywhere, so you can get high-quality recordings whether you're at your desk or on the go.
Common Questions About Recording Audio on a Mac
When you first start to record audio on Mac, it's normal to hit a few snags. You might be staring at a silent timeline or feel totally lost deciding between file types. Don't worry. Here are the quick answers to the most frequent problems people run into.
The classic issue is hitting record and getting… nothing. Before you start digging through complex settings, check the simple stuff first. Head over to System Settings > Sound > Input and make sure your microphone is actually selected. Many apps, from GarageBand to Audacity, have their own audio preferences too, so you might need to select your mic there as well. Honestly, this one simple check solves the problem 90% of the time.
Another thing that trips people up is file formats. "Should I save this as an MP3 or a WAV?" The real answer comes down to what you're doing with the audio next.
- WAV/AIFF: Think of these as the raw, uncompressed masters. If you're going to be editing, mixing, or doing any serious audio work, always go with these for the highest possible quality. The files are huge, but they give you all the data you need to work with.
- AAC/MP3: These are the smaller, compressed versions perfect for sharing. If you're uploading a podcast, emailing a clip, or just need a final version to send to someone, these are your best bet. An MP3 at 256 or 320 kbps is the sweet spot for great quality without a massive file size.
Why Can’t I Record My Computer’s Audio Directly?
This is probably the question I hear most often. By default, macOS intentionally blocks you from recording the sound coming out of your speakers. It's a design choice made for privacy and copyright protection. To get around this when you need to capture a webinar or a video call, you need to install a virtual audio driver like BlackHole, which cleverly reroutes your Mac's output back as an input source.
The inability to natively record system audio is a deliberate design choice in macOS. While it adds an extra step for creators, it prevents accidental or unauthorized recording of protected content and application alerts.
If that sounds too technical, a much simpler route is using a browser-based tool. Speechyou’s Meeting Mode, for instance, handles all this in the background, capturing both your microphone and the system audio without any complicated setup. It's perfect for recording meetings or online lectures. And because SpeechYou is having mobile apps, and available everywhere, you can manage recordings from your Mac, iPhone, or iPad all in one place.
Finally, what if your recordings sound terrible—all distorted and crunchy? That's called "clipping," and it means your input volume is way too high. Watch the audio meter in your recording app and turn down the input gain. You want your voice to peak comfortably in the yellow range, never hitting the red. Once a file is clipped, that distortion is baked in forever, so getting your levels right before you record is critical. You can also learn how to convert audio to text for free in our detailed guide.
Ready to record, transcribe, and summarize your meetings effortlessly? Speechyou uses AI to turn your Mac audio recordings into accurate, actionable notes in seconds. Try it for free today and see how simple capturing important conversations can be. Visit us at https://www.speechyou.com.
Share this article
Related Articles

AnswerPet Review: The AI Receptionist That Answers Every Call a Vet Clinic Misses
A detailed review of AnswerPet, the AI receptionist for veterinary clinics: how it works, what it ha...

Transcribe Voice Memo to Text: How to transcribe voice memo to text on devices
Learn how to transcribe voice memo to text quickly on iPhone, Android, and web with AI tools like Sp...

How to Transcribe Meeting Audio to Text Like a Pro in 2026
Learn how to transcribe meeting audio to text with proven methods. Capture crystal-clear audio and t...